

Vol.25 TECHNICAL COUNSELING FAQ(5) "HOLDING MARK"
Here are some of the questions we have contacted the Tool Consultation.
Holding mark
The following are generally considered as causes of marks on the upper and lower surfaces of the workpiece.
- 1.The end face of the die or guide is not flat.
When re-grinding dies, guides and strippers, the die may not be set properly on the grinder and the end face may be inclined. (See Fig.2) -
2.When the die is mounted, foreign matter (such as burrs) sticks on the bottom of the die, and the die is not properly installed. (See Fig.3)
When attaching a die to the die holder, it is recommended to clean not only the bottom of the die holder but also the area around it.
-
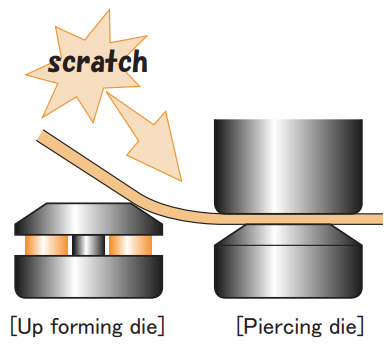
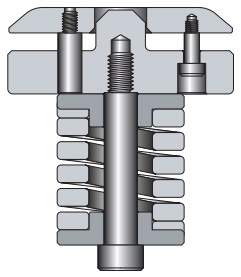
3.Up forming die has installed near standard tool station.
Up forming die are usually designed at higher die heights than standard dies. Therefore, if punching is performed near the up forming die, the material may be deformed and marked as shown in Fig.4.
In such a case, remove the high-height die at the periphery before processing. Also, depending on processing conditions,
low height die can be prepared by Conic, so please contact us.
Fig.1 Holding mark
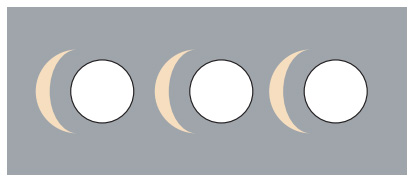
Fig.2 Die sharpened slantingly
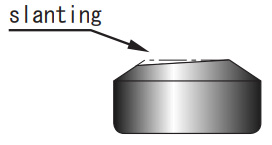
Fig.3 Die installed on slugs
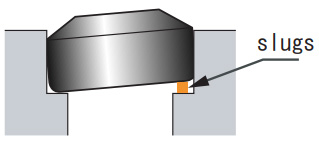
Fig.4 If piercing near the station where up forming die installed…
SHEET DISTORTION WHEN EMBOSS FORMING
Is there a good way to prevent warping?
A high rise embossed forming causes the material to warp and generate distortion.
As a countermeasure,
-
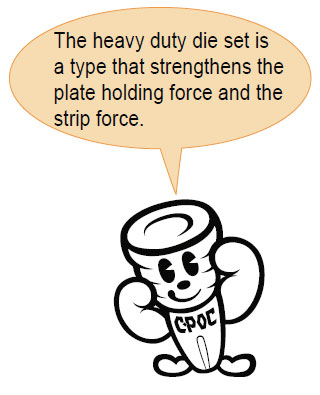
1.In the case of upward forming, by using heavy duty die for the lower die to increase the force to hold the workpiece and suppress distortion.
(Some machines cannot be fitted with the heavy duty type die.
Please check it before use it.)Also, by using a station of one size larger, the plate pressing force is strengthened to suppress distortion.
Fig.5 Heavy duty type die
-
2.Pre-piercing before forming step.
By pre-piercing before forming, distortion is reduced. In addition,
if possible in the product, by pre-piercing around the, it is possible to suppress the distortion of the material.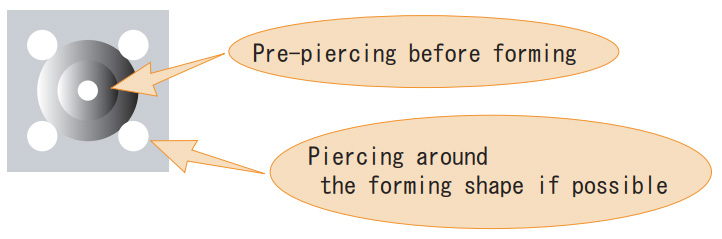
-
3.
It is recommended to perform frame removal after embossing for distortion generated when processing near the material end face.
We also offer tools that can be frame removing without crushing the embossing that was processed earlier.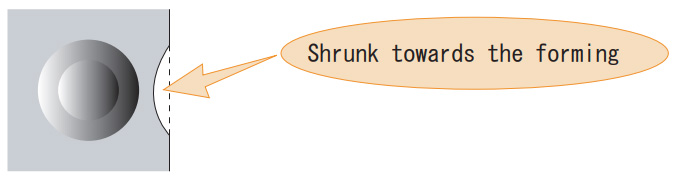
-
vol.1 COUNTERMEASURES FOR SLUG PULLING IN PUNCHING PROCESS
-
vol.2 LIFE COUNTERMEASURE FOR TOOLING
-
Vol.3 TOOL MAINTENANCE
-
Vol.4 FORMING TOOL
-
Vol.5 MATERIAL FOR TOOLING
-
Vol.6 FOR CLEARANCE OF THE CUTTING DIE
-
Vol.7 ABOUT TURRET PUNCH PRESS MACHINE
-
Vol.8 VARIOUS KINDS OF SPECIAL SHAPE
-
Vol.9 PARTS NAME OF STANDARD TOOLING
-
Vol.10 EACH NAMES OF FORMING TOOL
-
Vol.11 MATERIAL PROPERTIES (STEEL)
-
Vol.12 MATERIAL PROPERTIES
-
Vol.13 CALCULATION FORMULAS FREQUENTLY USED IN SHEET METAL
-
Vol.14 HEIGHT ADJUSTMENT FREE TOOL
-
Vol.15 HOW TO DRAW AND READ DRAWINGS
-
Vol.16 HOW TO DRAW AND READ DRAWING (PRACTICAL USE)
-
Vol.17 SHAPE INSTRUCTION FOR FORMING TOOLS(1)
-
Vol.18 SHAPE INSTRUCTION FOR FORMING TOOLS(2)
-
Vol.19 CODE MANAGEMENT
-
Vol.20 BENDING TECHNICAL INFORMATION
-
Vol.21 TECHNICAL COUNSELING FAQ(1) "COUNTERMEASURES FOR GALLING"
-
Vol.22 TECHNICAL COUNSELING FAQ(2) "BURRING FOR THREAD FORM"
-
Vol.23 TECHNICAL COUNSELING FAQ(3) "PITCH OF SINGLE PIERCING"
-
Vol.24 TECHNICAL COUNSELING FAQ(4) "SHEAR OPTIONS"
-
Vol.25 TECHNICAL COUNSELING FAQ(5) "HOLDING MARK"
-
Vol.26 TECHNICAL COUNSELING FAQ(6) "SOLUTION FOR SLUG PULLING OF A SHEET METAL WITH PROTECTIVE FILM"
-
Vol.27 TECHNICAL COUNSELING FAQ(7) "MATERIAL WARPING PREVENTION DURING"
-
Vol.28 TECHNICAL COUNSELING FAQ(8) "WARPING PREVENTION OF BLANKING OUT"
-
Vol.29 TECHNICAL COUNSELING FAQ(9) "COUNTERSINK FOR COUNTERSUNK SCREW"
-
Vol.30 THE ORDERING GUIDE(1) "HOW TO INSTRUCT SHAPE AND DIMENSIONS"
-
Vol.31 THE ORDERING GUIDE(2) "REFERENCE KEY DIRECTION"
-
Vol.32 THE ORDERING GUIDE(3) "ANGLE INDICATION OF ANGLED TOOL"
-
Vol.33 THE ORDERING GUIDE(4) "SELECT SPECIFICATION OF PUNCH"
-
Vol.34 THE ORDERING GUIDE(5) "DIE SPECIFICATION SELECTION"